How to Create a Project
Follow these steps to set up a new cross-stitch project.
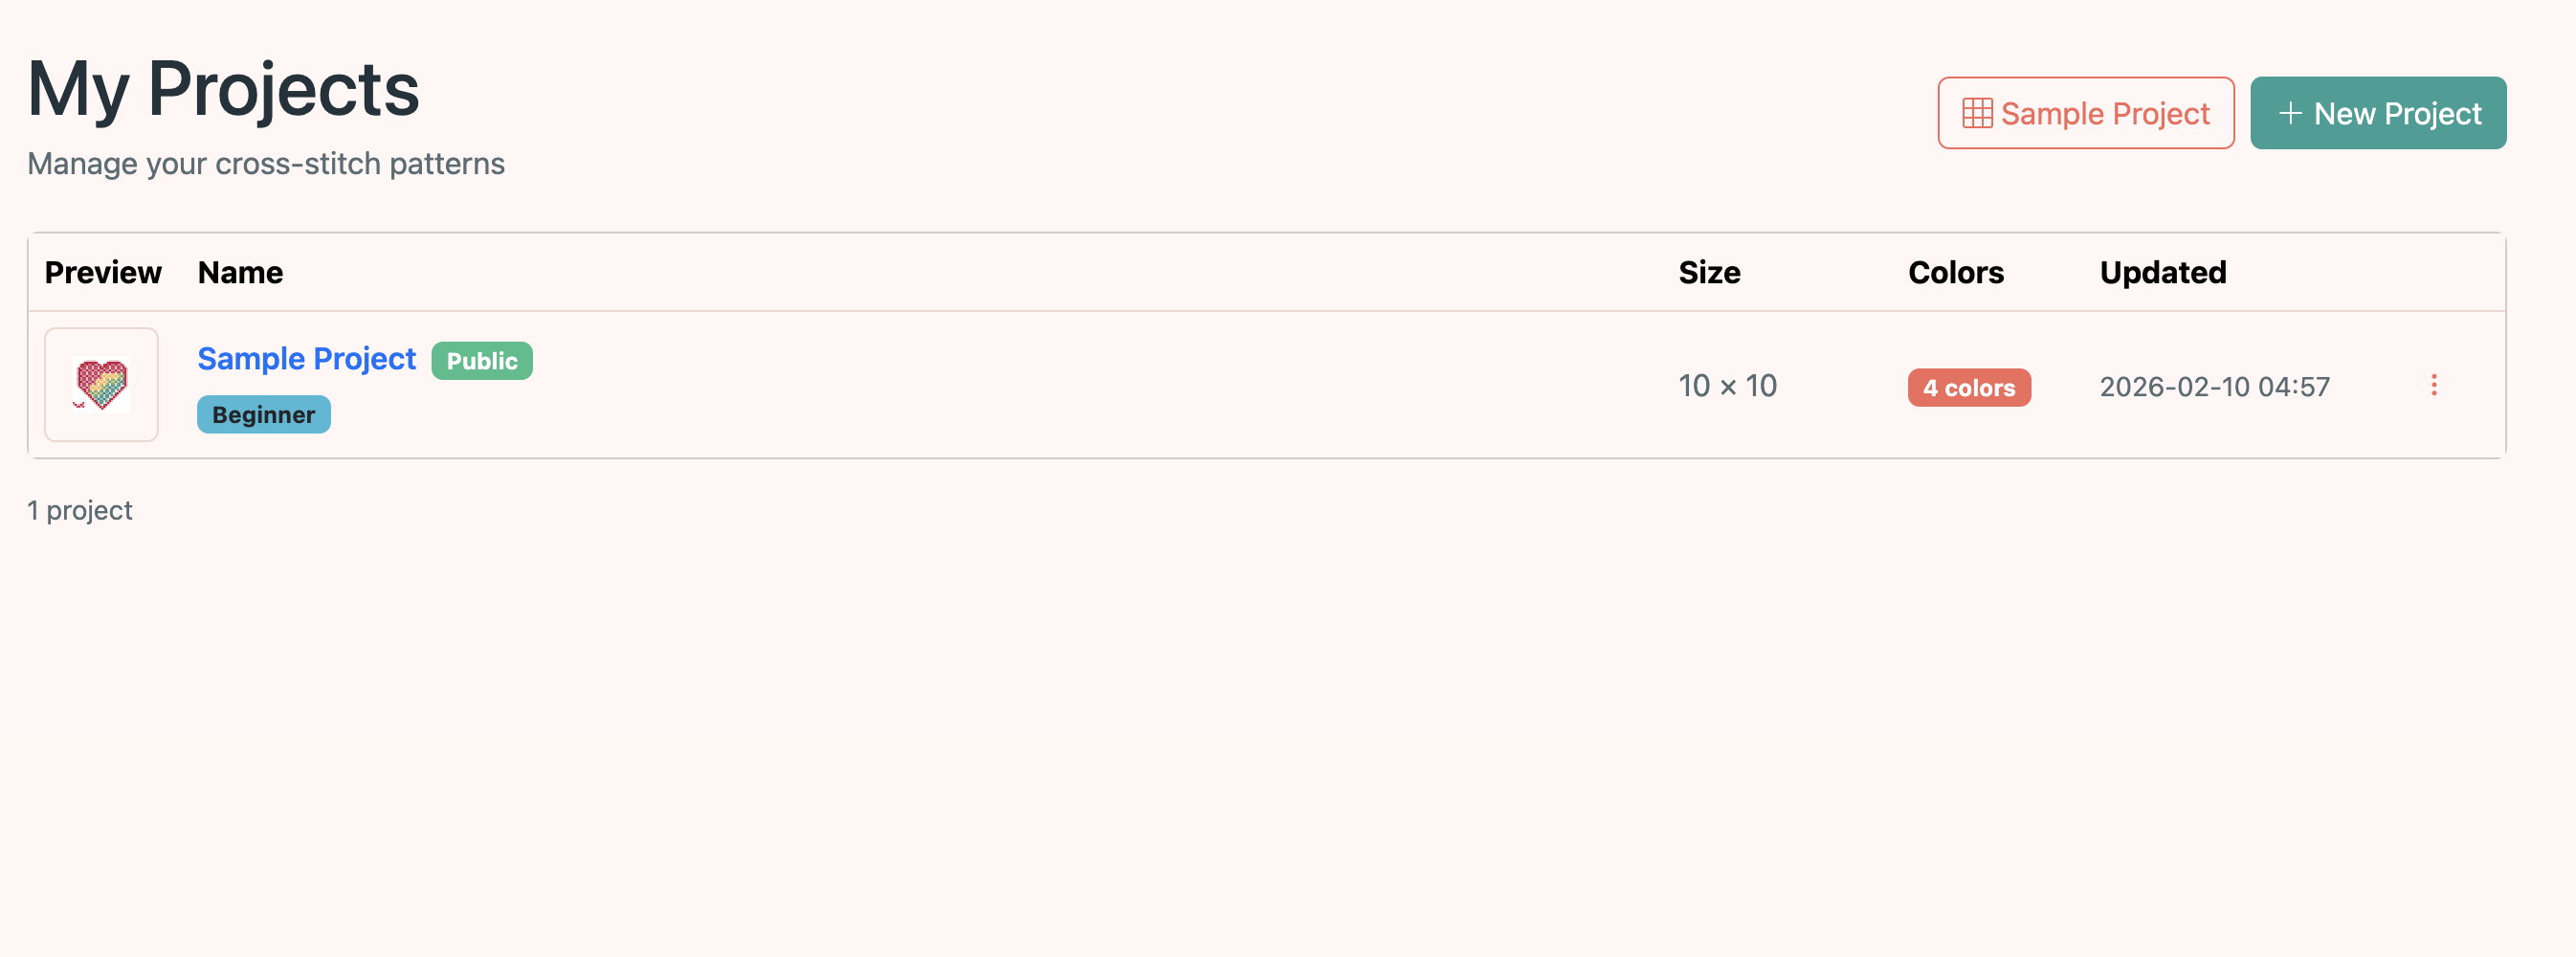
Open My Projects and click "New Project"
Navigate to the My Projects page from the navbar. Click the New Project button to start the creation wizard. You can also try the Sample Project button to instantly create a pre-made project with colors and stitches already in place — great for exploring the editor without any setup.
Set up your project
Enter a name and optional description for your project. Choose the canvas size (width and height in stitches).

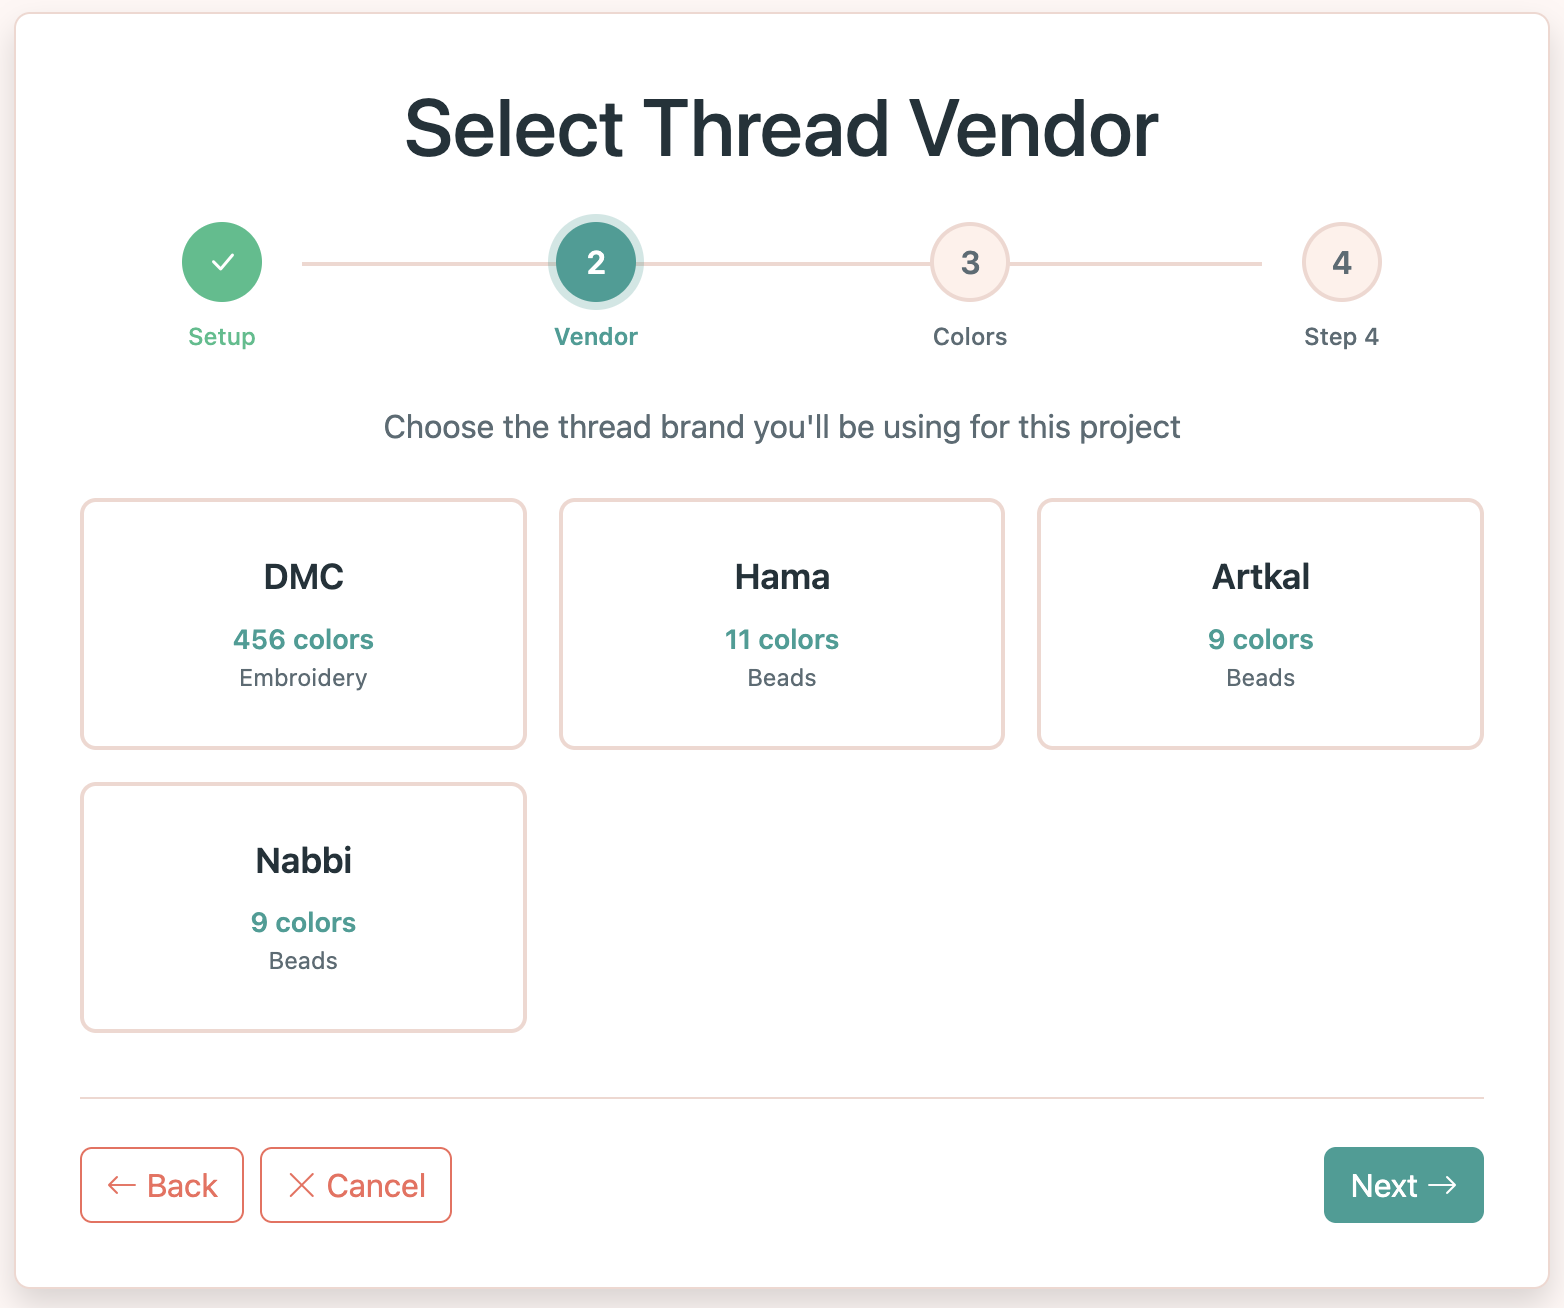
Select a thread vendor
Choose the thread brand you'll be working with: DMC, Hama, Artkal, or Nabbi. This determines which color catalog is available for your palette.
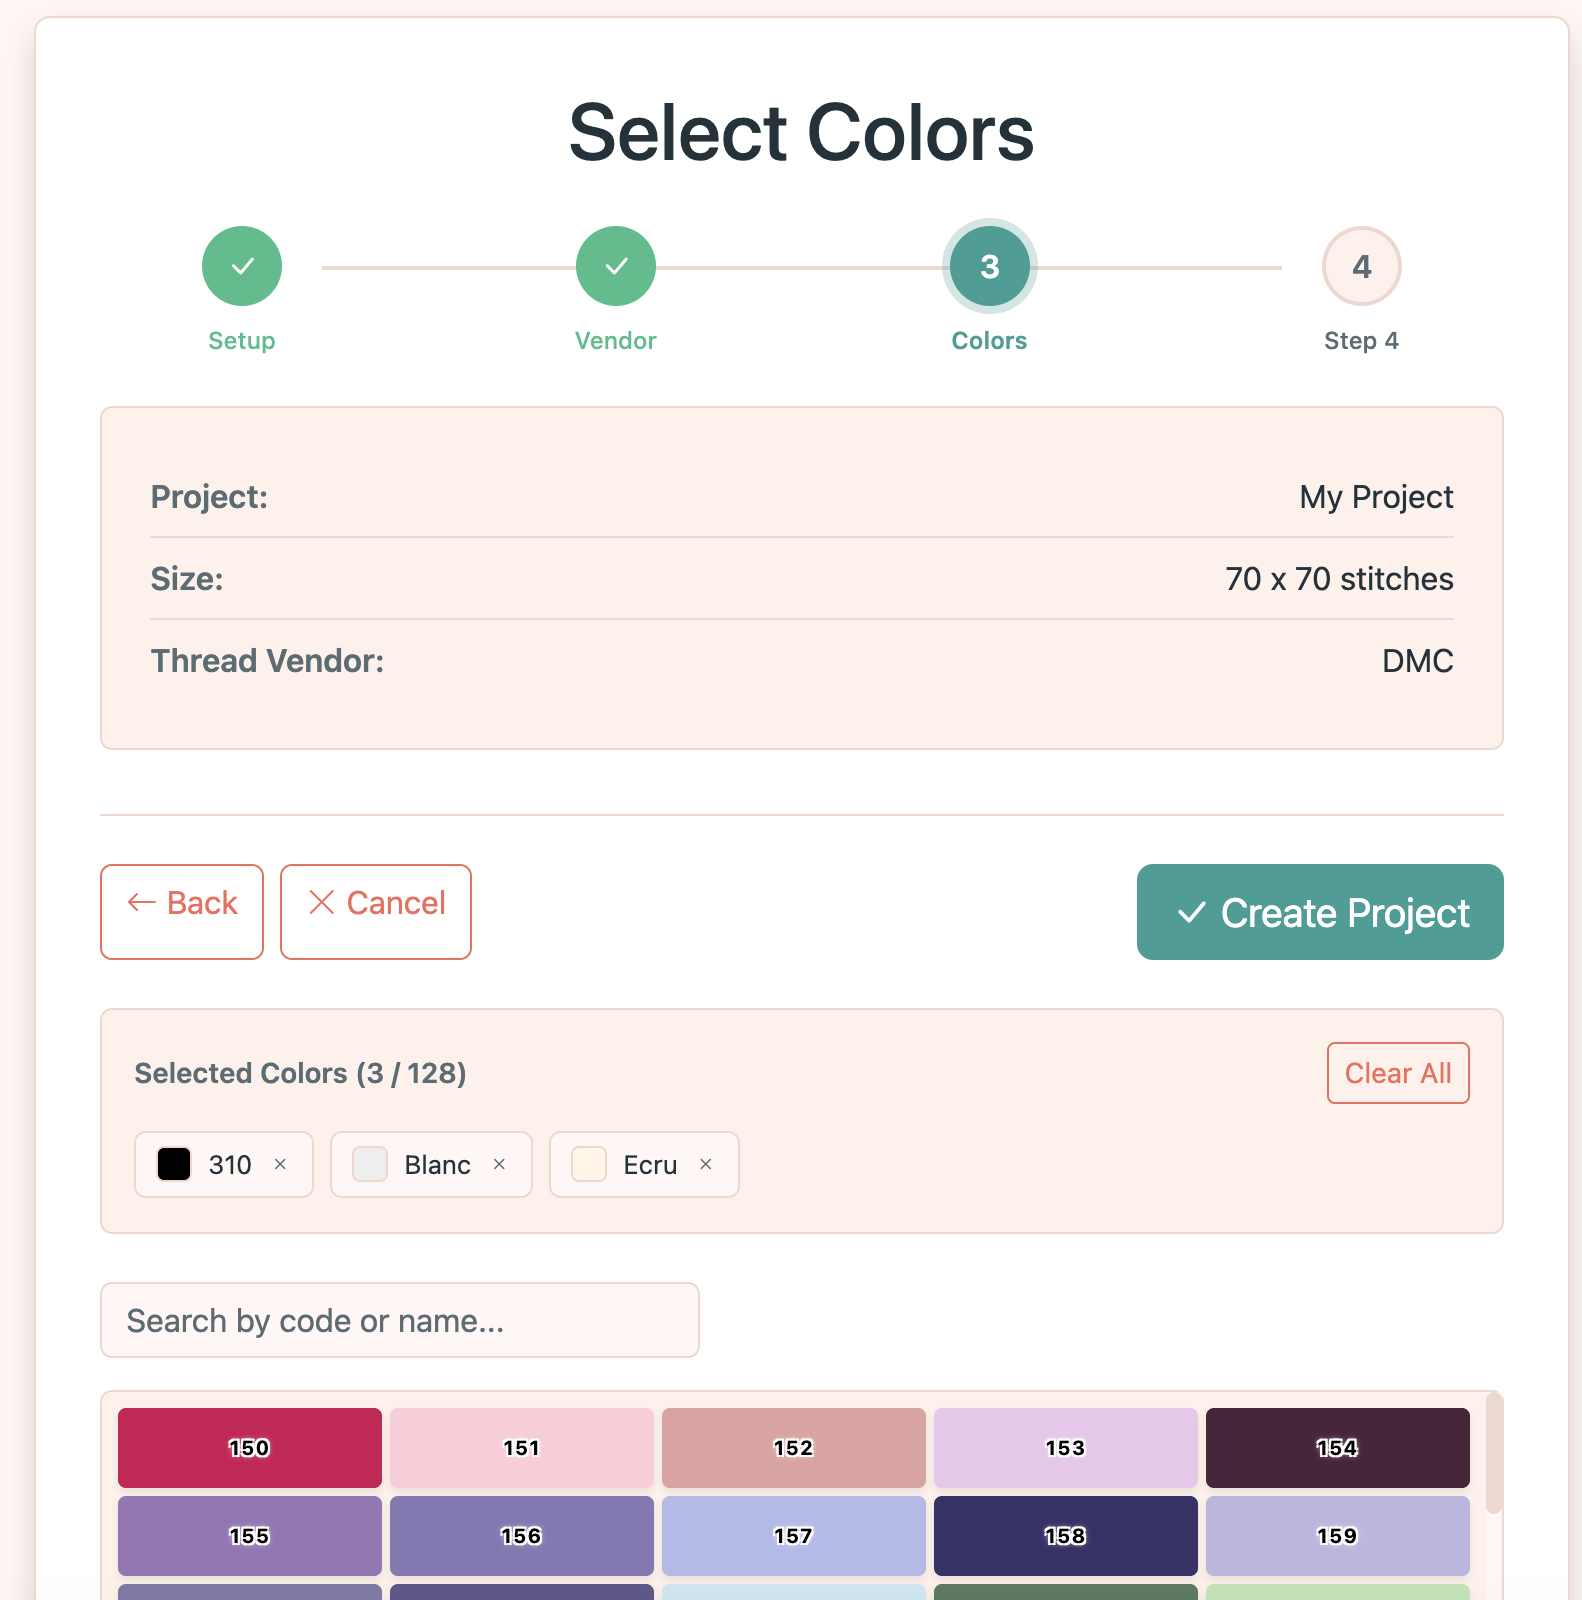
Pick your colors
Browse the color catalog and add colors to your palette. You can search by name or code. Selected colors will appear in your project's palette.
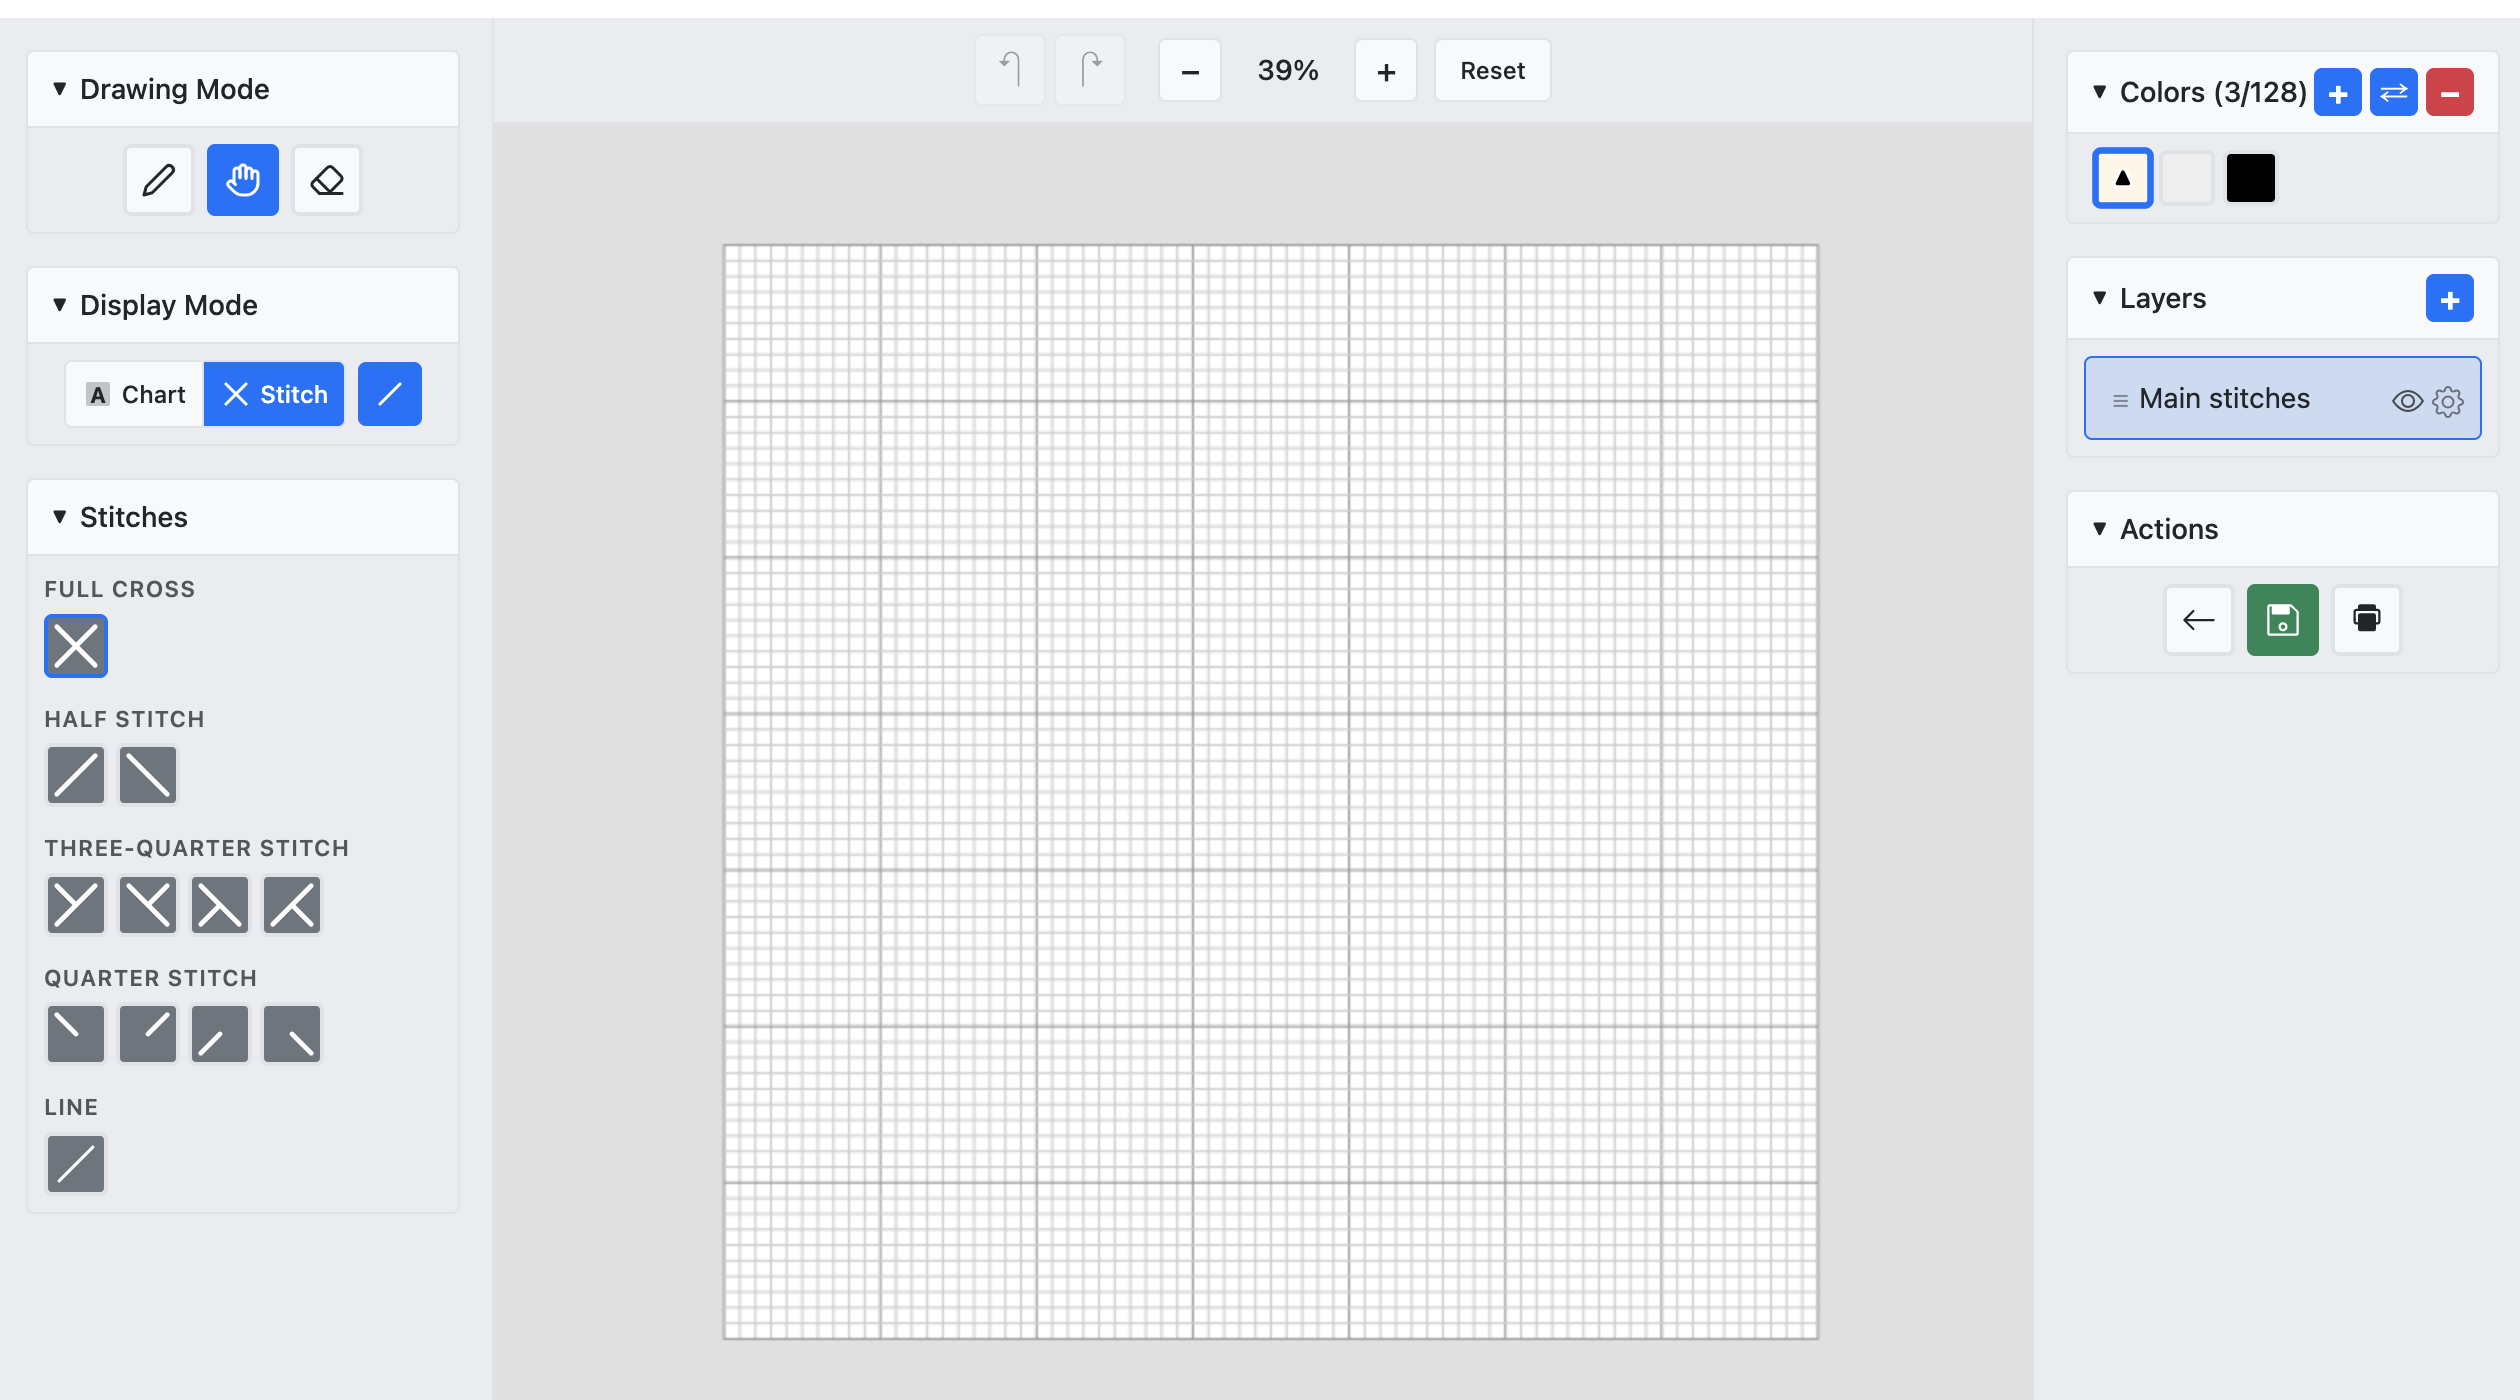
Start editing
Your project is created and the editor opens automatically. You're ready to place stitches on the canvas!