How Does Smart Image Work?
Smart Image is a new way to turn pictures into cross-stitch patterns. Instead of shrinking your photo to fit the canvas, it uses AI to generate a brand-new image at the exact stitch resolution — producing cleaner, more detailed patterns.
The challenge: photos don't shrink well
Cross-stitch works on a much smaller resolution than a typical photo. A 70×70 stitch canvas is only 70 pixels wide — while your photo might be 3000 pixels wide. Traditional image-to-pattern tools simply resize the photo down to fit. But resizing means sampling and averaging pixels together, which blurs fine details, muddles colors, and creates artifacts. The smaller the canvas, the worse the results.
This has always been the fundamental problem with converting pictures into cross-stitch patterns: you're trying to represent a complex image with very few stitches, and downscaling destroys the information you need most.
The solution: generate a new image instead of resizing
Smart Image takes a completely different approach. Instead of resizing your uploaded image, it reads and understands what's in the picture — the shapes, colors, composition, and subject matter — and then generates a brand-new image that's already at the exact size of your canvas.
This AI-generated version is designed from the start to look good at low resolution. It uses clean edges, flat color areas, and strong contrast — exactly the qualities that make a great cross-stitch pattern. The result is a pixel art interpretation of your original image that converts beautifully into stitches.
Step 1: Upload and position your image
After setting up your project (name, size, vendor), choose Smart Image on the creation screen. You'll see a familiar upload page where you can drop any image.
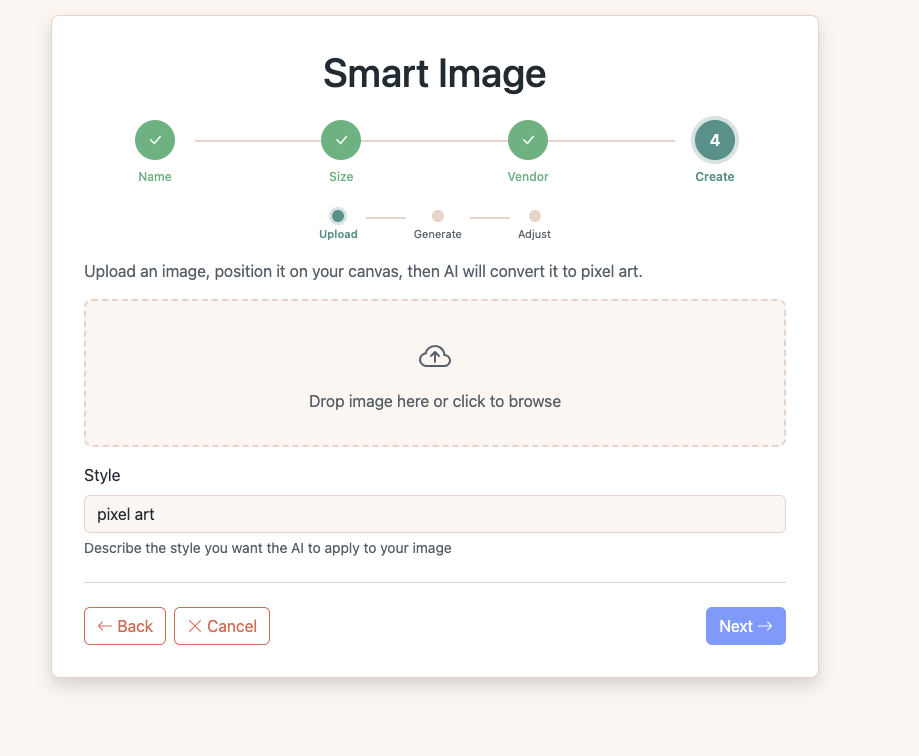
Once you select a file, a positioning canvas appears. Use the Scale slider to zoom in on the area you want to stitch. Drag the image to reposition it within the frame. You can also adjust brightness, contrast, and saturation before proceeding.

The Style field lets you describe what you want the AI to create. The default "pixel art" works well for most images, but you can experiment with other descriptions.
Step 2: AI generates a new image at canvas size
When you click Next, the positioned area is sent to our AI service. Instead of simply shrinking the image, the AI analyzes it and generates a completely new version at the exact dimensions of your canvas. This is the key difference — every pixel in the result is purposefully placed, not averaged from a larger source.
The generation takes a moment. You'll see a blur-to-reveal animation while the AI works, and the result appears when it's ready:
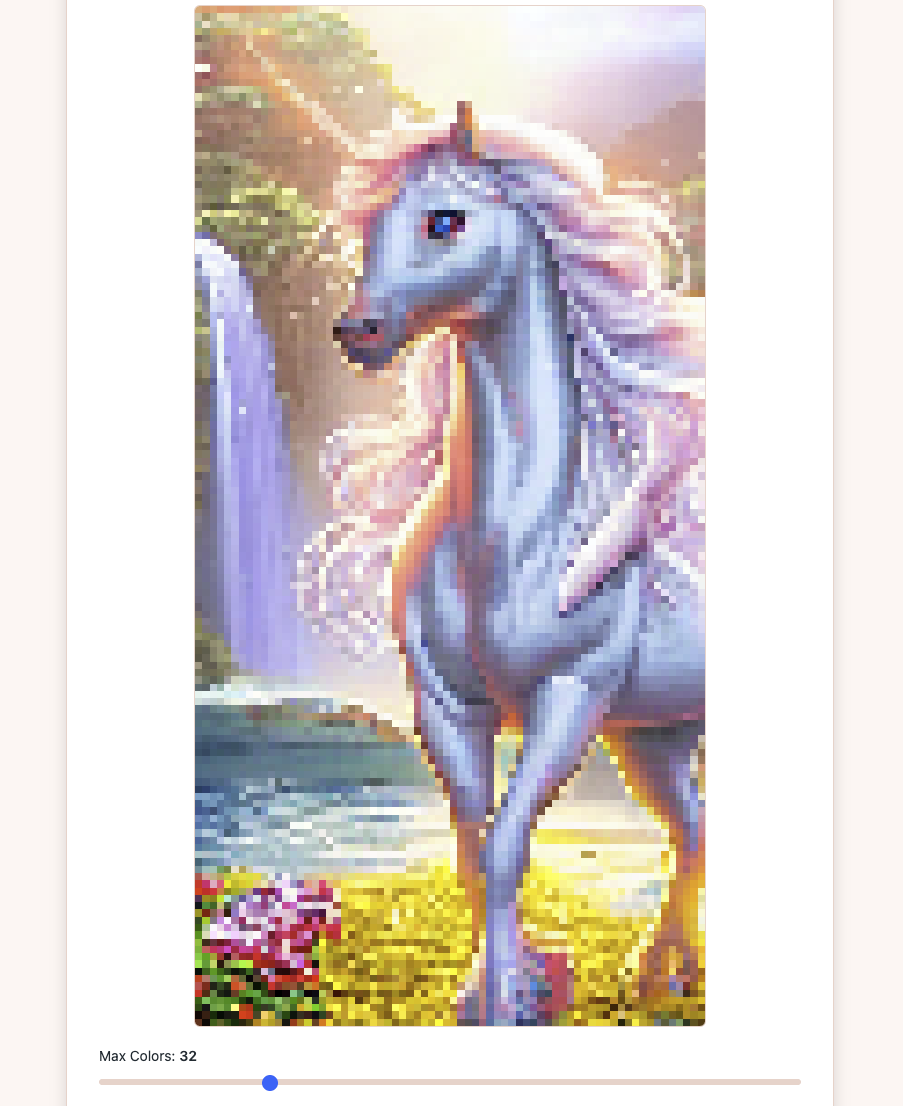
Notice how the result is already pixel art — clean edges, distinct color areas, and no blurriness. This is what the AI created specifically for your canvas size. You can also choose how many Max Colors to use in the final pattern before proceeding.
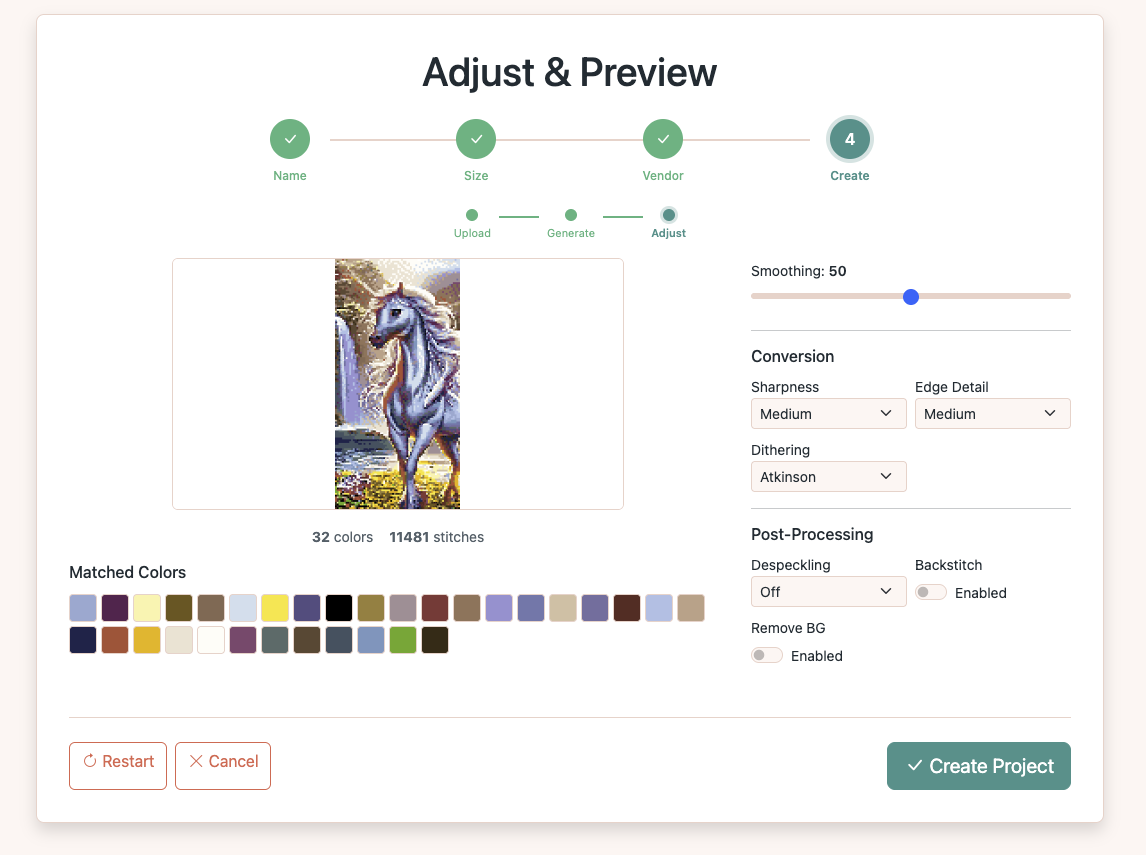
Step 3: Fine-tune the conversion
The final step converts the AI-generated image into actual cross-stitch stitches with matched thread colors. The Adjust & Preview screen gives you full control over the conversion settings:
- Smoothing — reduces noise and isolated stitches
- Sharpness & Edge Detail — controls how crisp edges appear
- Dithering — blends colors for smoother gradients
- Despeckling — removes single-stitch specks
- Backstitch & Remove BG — optional outlines and background removal
Every change updates the preview instantly. The matched color palette shows exactly which threads you'll need:
Why this approach works better
| Traditional (resize) | Smart Image (AI) | |
|---|---|---|
| Method | Shrinks original image pixels | Generates a new image at canvas size |
| Edges | Blurry, averaged | Clean, purposeful |
| Colors | Muddy, mixed during resize | Flat, distinct areas |
| Detail | Lost at small sizes | Adapted to fit the resolution |
| Best for | Large canvases, simple images | Any size, complex images |
The traditional "From Image" option is still available and works great when you have a large canvas or a simple source image. Smart Image shines when you want to convert detailed photos or illustrations onto smaller canvases where resizing alone would lose too much.
Setting expectations
We want to be upfront: converting images to cross-stitch is still a long way from perfect. A pattern designed by a human stitcher will always have that personal touch, intentional color choices, and artistic decisions that no algorithm can fully replicate.
That said, Smart Image produces surprisingly good starting points. You can always open the result in the editor and refine individual stitches, swap colors, or adjust the pattern by hand. Think of it as a powerful first draft rather than a finished piece.
We're actively improving the AI model and conversion pipeline. If you have feedback or suggestions, we'd love to hear from you.
Ready to try it?
Smart Image is available to all registered users. To use it:
- Create a new project and set your canvas size and thread vendor
- On the creation step, choose Smart Image (marked with a Beta badge)
- Upload any image, position it, and let the AI generate your pattern
- Fine-tune the conversion and create your project
Want the full step-by-step walkthrough? See our Create Pattern from Image guide.